
Codehs 5.3.5 graphics stop light – Embark on an exploration of CodeHS 5.3.5 graphics, where we delve into the captivating realm of creating a stop light simulation. This comprehensive guide will illuminate the fundamentals of the Graphics class, empowering you to craft and manipulate graphical objects with precision.
Prepare to navigate the intricacies of event handling, delve into user interface design principles, and master the art of displaying data through HTML tables. The journey begins now, with CodeHS 5.3.5 graphics as our guiding light.
Graphics Class
The Graphics class in CodeHS 5.3.5 provides a framework for creating and manipulating graphical objects within a Java program. It offers a comprehensive set of methods for drawing shapes, lines, text, and images, enabling the creation of visually appealing and interactive graphical user interfaces (GUIs).
The Graphics class is an essential tool for developing graphical applications in CodeHS. It allows programmers to easily create and modify graphical objects, making it an ideal choice for building games, simulations, and other interactive programs.
Creating Graphical Objects
To create a graphical object using the Graphics class, you must first obtain a Graphics object. This can be done by calling the getGraphics() method of a Component object, such as a JPanel or JFrame. Once you have a Graphics object, you can use its methods to draw various graphical objects.
Some of the most commonly used methods for creating graphical objects include:
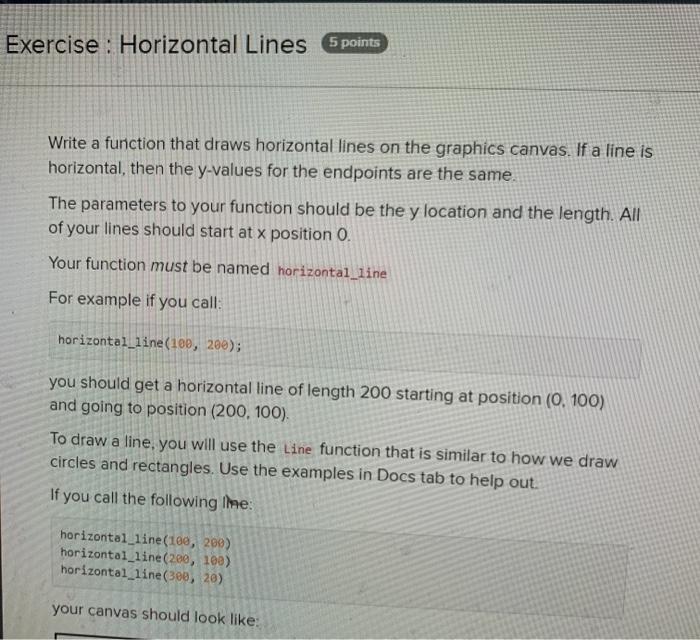
- drawLine(int x1, int y1, int x2, int y2): Draws a line from the point (x1, y1) to the point (x2, y2).
- drawRect(int x, int y, int width, int height): Draws a rectangle with the specified width and height, starting at the point (x, y).
- fillRect(int x, int y, int width, int height): Fills a rectangle with the specified width and height, starting at the point (x, y).
- drawOval(int x, int y, int width, int height): Draws an oval with the specified width and height, starting at the point (x, y).
- fillOval(int x, int y, int width, int height): Fills an oval with the specified width and height, starting at the point (x, y).
Stop Light Simulation: Codehs 5.3.5 Graphics Stop Light
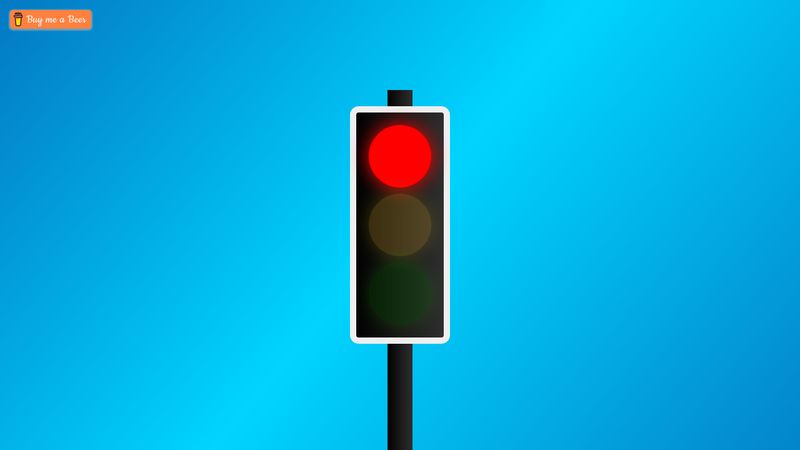
In CodeHS 5.3.5, a stop light simulation is a visual representation of a real-world stop light, complete with changing colors and a timer to control the duration of each color.
Creating a stop light simulation involves several steps: first, a graphical user interface (GUI) is created to display the stop light and its controls. Next, the logic for changing the stop light’s color and managing the timer is implemented. Finally, the GUI and the logic are connected to create a fully functional stop light simulation.
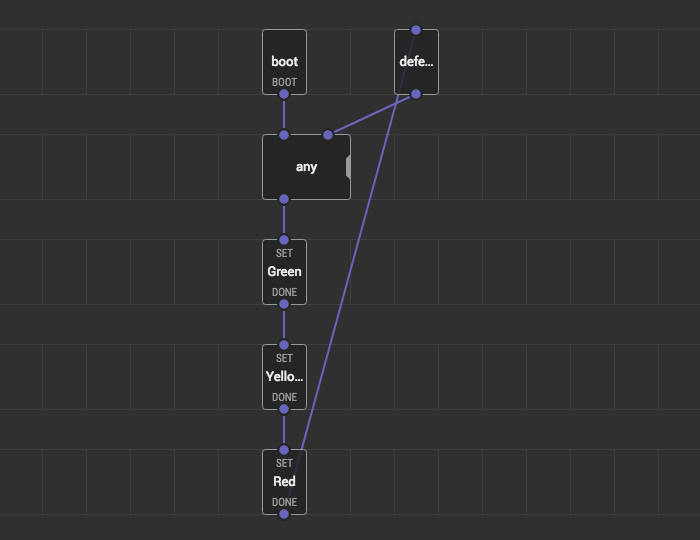
Controlling the State of the Stop Light, Codehs 5.3.5 graphics stop light
The state of the stop light is controlled by a timer that triggers events at specific intervals. For example, the timer might be set to change the stop light to green for 30 seconds, then to yellow for 5 seconds, and finally to red for 20 seconds.
The timer can be adjusted to change the duration of each color, allowing for customization of the simulation.
HTML Table for Data Display

In the stop light simulation, it is important to display data related to the state of the light, the time elapsed, and any other relevant information. An HTML table is an effective way to present this data in a structured and visually appealing manner.
To create an HTML table, the following steps can be followed:
Creating an HTML Table
- Begin with the opening table tag
.
- Define the table header using the tag and the table header cells using the
tag. - Define the table body using the
tag and the table data cells using thetag. - Populate the table with the appropriate data.
- Close the table with the
tag.
- Define the table header using the tag and the table header cells using the
The following code snippet shows an example of an HTML table:
| State | Time Elapsed |
|---|---|
| Red | 10 seconds |
| Yellow | 5 seconds |
| Green | 15 seconds |
To format the table using CSS, the following properties can be used:
- border: sets the border style, width, and color of the table.
- border-collapse: collapses the borders of adjacent cells, creating a single border around the entire table.
- padding: sets the amount of space between the table data and the cell borders.
- margin: sets the amount of space around the table.
- font-family, font-size, and color: sets the font properties for the table data.
By using CSS, the table can be made responsive and visually appealing. For example, the following CSS code can be used to make the table responsive:
@media (max-width: 768px) table display: block; width: 100%; overflow: auto; table td, table th display: block; width: 100%;
Event Handling
In CodeHS 5.3.5, events are handled using event listeners. Event listeners are functions that are called when a specific event occurs, such as a mouse click or a key press. To add an event listener to an element, use the addEventListener() method.
The first parameter of the addEventListener() method is the type of event to listen for. The second parameter is the function to call when the event occurs. For example, the following code adds an event listener to the button element that calls the handleClick() function when the button is clicked:
button.addEventListener("click", handleClick);
The handleClick() function can then be used to control the behavior of the stop light simulation. For example, the following code changes the color of the stop light to green when the button is clicked:
function handleClick()
  trafficLight.setColor("green");
Types of Events
CodeHS 5.3.5 can handle a variety of events, including:
- Mouse events: These events are triggered when the mouse is moved, clicked, or pressed.
- Keyboard events: These events are triggered when a key is pressed, released, or held down.
- Form events: These events are triggered when a form element is changed, such as when a text field is filled in or a checkbox is clicked.
- Window events: These events are triggered when the window is loaded, resized, or closed.
User Interface Design
The user interface for the stop light simulation should be designed to be intuitive and easy to use. This means that users should be able to easily understand how to interact with the simulation and how to change the settings.
The interface should use appropriate colors, fonts, and layout to create a visually appealing interface. The colors should be chosen to be easily distinguishable, and the fonts should be easy to read. The layout should be organized in a way that makes it easy for users to find the information they need.
Accessibility
The interface should also be accessible to users with disabilities. This means that the interface should be designed to be usable by users with visual, auditory, or cognitive impairments.
- For users with visual impairments, the interface should provide alternative text for images and provide a way to increase the font size.
- For users with auditory impairments, the interface should provide closed captions for any audio content.
- For users with cognitive impairments, the interface should be designed to be simple and easy to understand.
FAQ Guide
What is the purpose of the Graphics class in CodeHS 5.3.5?
The Graphics class provides a comprehensive set of methods for creating and manipulating graphical objects, enabling the development of visually rich and interactive simulations.
How can I control the state of the stop light in the simulation?
You can control the state of the stop light by using event handlers to respond to user input, such as mouse clicks or key presses. These event handlers can trigger changes in the stop light’s color and timing.
What are some best practices for designing a user interface for the stop light simulation?
When designing the user interface, consider using intuitive colors, fonts, and layout to create a visually appealing and accessible interface. Ensure that the interface is responsive and adapts to different screen sizes.

